
I’ve been looking for a wall calendar to pop up near my desk, I knew what I wanted, one with 3 months in a row and something pretty! I looked every where and couldn’t find one but, when our new Seasonal Expressions 1 catalogue came out and it had a set of awesome Thin Cut – Block Numbers (cheering!) I knew exactly what to do 🙂 …I’d make my own.
 I searched google and found the exact calendar I was after, printed it out and gathered a few fun products and started to create. The paper I used is from the new Seasonal Expressions 1 called ‘Gimme Some Sugar’ it’s SO sweet.
Fun fact: my new Thin Cuts – Block Numbers fit perfectly on our
Thin Cuts – Basic Banners ‘winning’ and here’s how it all came together…


I cut my numbers in White Daisy Cardstock with my Cuttlebug (if you have a Bigshot this works well too) and my banners I cut in our Bashful Cardstock which is the cutest shade of pink!
Fun fact: ALL the Close To My Heart Thin Cuts come on a magnetic sheet – just like the numbers above which is so handy to keep them all together.
Did you know ALL our Close To My Heart Cardstocks are two-toned?
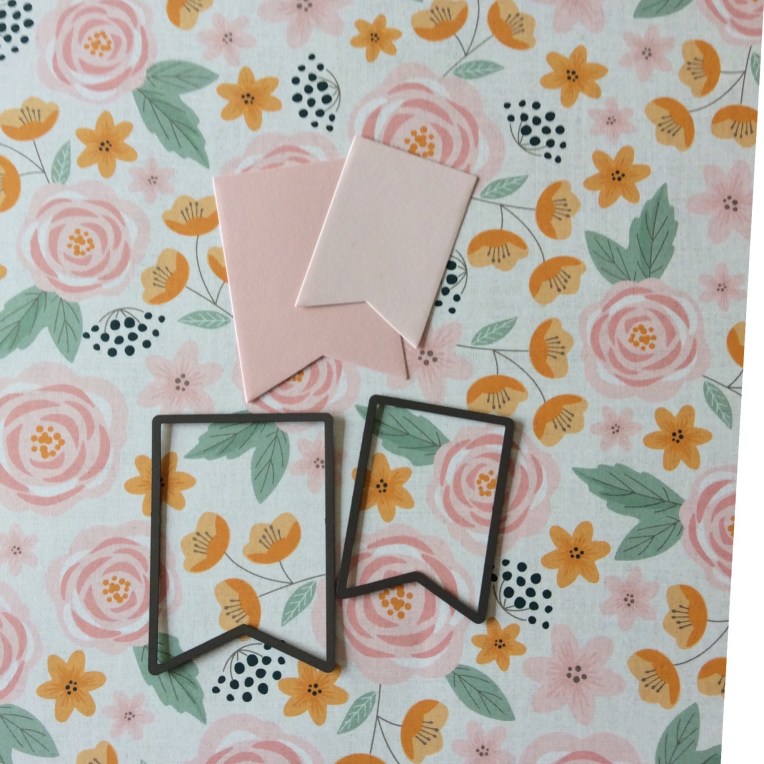
To give you more flexibility as you create our two-toned cardstock features the original colour on one side and the other side features a lighter shade which makes it SO cool to create with. You can see here with my banners I cut the largest banner in the original colour then I turned over my cardstock and cut the smaller banner in the lighter shade – for someone like me who LOVES playing with paper this is awesome! Also, see the Thin Cut – Basic Banners just sitting there on the paper – you can use these to cut your pretty papers to, not just Cardstock!

I adhered my numbers onto the banners with my Close To My Heart Adhesive Runner which works perfectly for all types of paper crafting. I used our cool 3-D Foam Dots to raise the banner up to make it stand out. Then it was a matter of adhering it all together to make my perfect wall calendar.
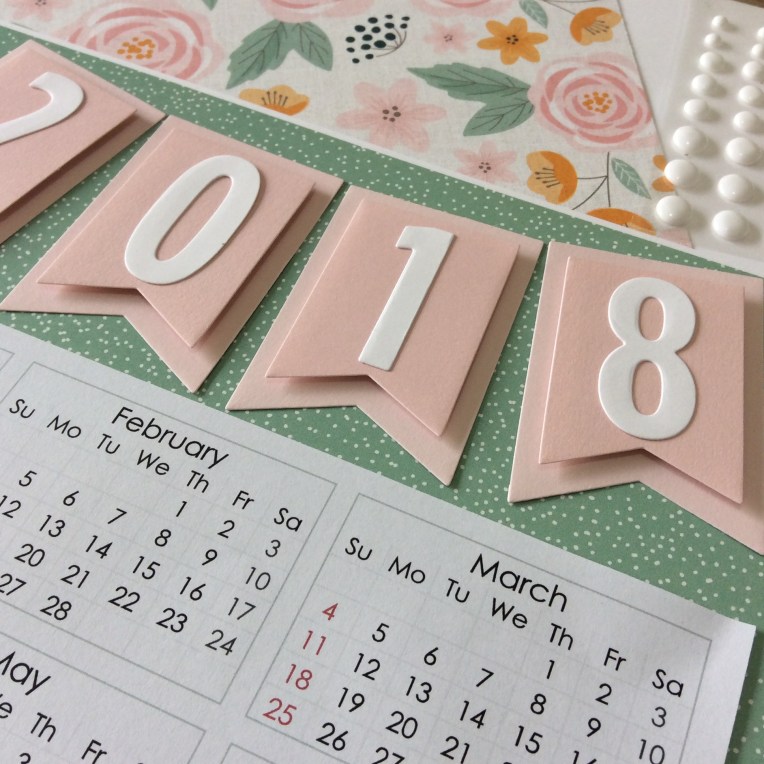
To finish off I embellished it with a couple of small White Dots.
It was a whole lot of fun to make and came together rather quickly and since January is National Papercrafting Month it was a perfect project to make.

Check it out! I’m so pleased with the end result – my new calendar will see me through this brand new year.
I hope I have inspired you to create something pretty for yourself to start your year off perfectly.
Happy Papercrafting Month!
Jacquie x
To make your own 2018 Calendar here is a list of products I used.
You can view, order and have it delivered straight to your door at
http://www.jacquiepaech.ctmh.com.au
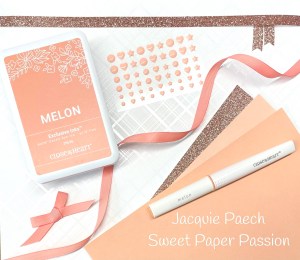
Gimme Some Sugar Paper Pack X7228B
White Daisy Cardstock 1385
Bashful Cardstock Z5941
Thin Cut – Block Numbers Z4159
Thin Cut – Basic Banners Z3345
CTMH Adhesive Runner Z3372
3-D Foam Dots Z3342
Black & White Dots Z3314

This is adorable! You’ve inspired me to make one of my own as well.
LikeLike
This is beautiful Jacqui. Might have to do one too! Thanks for sharing
LikeLike
I. Absolutely. LOVE. This!! I’m going to tweak this a bit to add to my planner. Thanks for the inspiration.
LikeLike